Top Five Tips – Stratify Edition
You’re using (or thinking about using) InventoryLab, but you want to make sure you’re getting the most out of it. Where do you even begin?! You don’t even have to ask – we’re here to help!
Whether you’re just starting out or you’re already a user, we have the top 5 things you want to do within InventoryLab to make life easier!
List through InventoryLab for easy accounting
Listing via InventoryLab has many great benefits, but did you know it can help with your accounting and profitability? First, you can add your accounting information such as buy cost, supplier, and purchased date right into a batch. This translates over to your inventory pages in Stratify.

You can also see your estimated Net Profit based on your list price, buy cost, and Amazon fees. If you know you want to meet a specific ROI with each sale, you can type it in and we’ll automatically populate the price you should sell the item for!
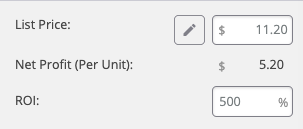
Once you’re finished adding your items to a batch, you can get an estimated look at the total net profit of the entire batch.

Finally, to assist with pricing decisions, you have access to research tools right while listing. It includes direct links to Bookscouter, eBay, Google Search, CamelCamelCamel, Keepa, the Amazon Prime offers page, and the Seller Central Add a Product page in order to check your restrictions.
![]()
Set up your defaults
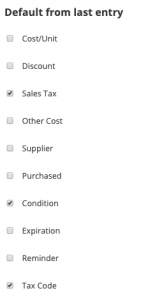
It’s nice not having to type in the same information over and over! You can set up defaults for your listing information so that it automatically populates the last thing entered. Do all of your items typically have the exact same Sales Tax and Tax Code? Head on over to your Advanced Settings to select these options to default from last entry.
You can go even further with this by setting up default condition notes. Maybe you’re a bookseller and tend to type in the same information for Used – Like New or Used – Good items. With just a little work in your settings, you can set these up so that each time you choose that condition for an item, your words will magically appear!
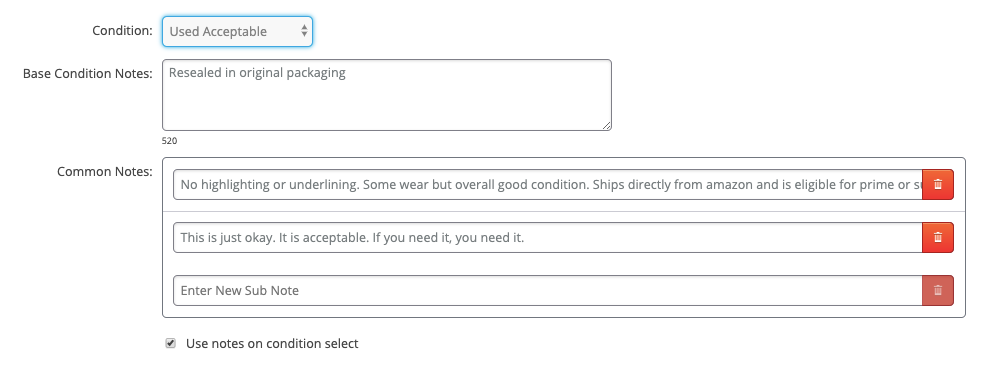
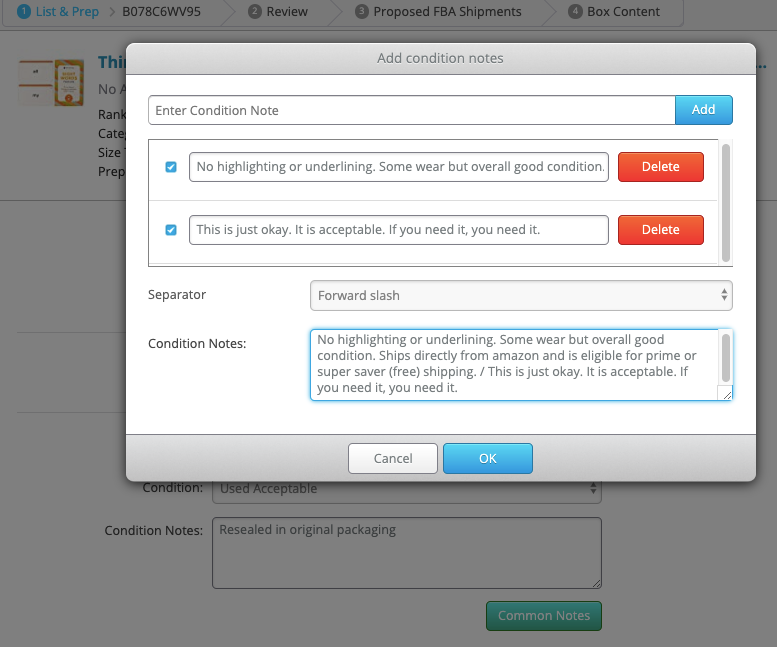
Use ‘Common Notes’ while listing to be able to quickly fill in extra information that may differ between items with the same condition.
Use your Auto Price rules
Similar to setting up listing defaults, maybe you don’t always want to do the math for your list price. With auto price rules, you have the option to match the buy box price or make the price a certain percentage or dollar amount higher or lower than the buy box. You can even set a certain dollar amount of profit, a certain percentage of ROI, or Profit Margin. Setting the list price to a fixed value every time or having it default from the last entry is also an option.
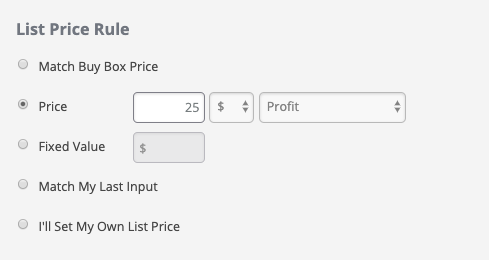
Using auto price rules allows you to not have to worry about entering a list price each time you list something in a batch. If you want to make sure your prices don’t go over or under a certain amount, you can set up Min and Max prices.
Use your box contents tools
You probably know you can fulfill your box content information requirements through InventoryLab, and while it’s already pretty fast, your box content tools can make things even more efficient!
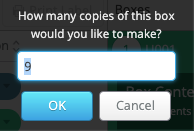
Copy Boxes
Use the Copy Boxes feature if you plan to place the same items in each box. No need to do the math – we’ll automatically place the amount of times you can copy within the field.
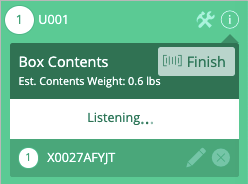
Scan to Pack
In both Live and Private workflows you have the ability to scan items for box contents so you can immediately add an item to a box. You can do this by scanning a printed FNSKU label or a UPC.
Bulk Assign
In a Private workflow, you can quickly check boxes next to each item and choose ‘Assign to Box’ to place them all in the same box at once.

Auto Assign
In a Live workflow, you can have your items auto assigned to boxes as soon as they are added to a batch! Just turn Auto Assign ON when creating your batch.
![]()
Print (or Auto Print!) your labels
While you can print 30 Up labels in Seller Central, using a thermal label printer to print labels in InventoryLab is a great time saver! Perfect labels that include all required information and fit with Amazon’s guidelines can be printed in no time in various locations within Stratify. Use IL Print to speed things up!

If you don’t want to click to print, you can set up auto print within your settings right from the list page. You can set your labels to auto print after you add an item to a batch, if you change a quantity in your batch, or after you print a label using our Scan to Pack feature.

Use all of the above tips and you’ll be on your way to pro status in no time! For more tips like this, check out Tips & Tricks Efficiency Tools video.
Try InventoryLab Today
30 Day Free Trial
Save time and money by streamlining your Amazon business. Source, List, Ship, and Analyze all in one place.
Get Started
Comments(0)