Using a Prep Center With InventoryLab
Planning out your future, or is your future now? Outsourcing to an Amazon FBA Prep Center can help free up time to focus on other aspects of your business. Read on to see how to work with a prep center and use InventoryLab!
One of the first things you might consider, as you scale your business, is outsourcing your prep and shipping. You can use InventoryLab to track your buy cost information, while also having a prep center handle the process of shipping your products to an Amazon fulfillment center.
If you wish to incorporate our batch process into your workflow for effortless and efficient tracking of your purchase cost data, you have multiple choices at your disposal.
Scenario One: Your Prep Center Uses Your InventoryLab Account
With this option, your prep center logs in to your account as an employee. They can choose to either work with batches that already exist or make new ones when sending products to the prep center.
If you need to keep your purchase costs and suppliers confidential, this method may not be suitable for you. However, it is the most effective way to incorporate a prep center into your workflow.
Using this option, you source your products and have them sent to the prep center. They handle it from there, with your guidance on list prices and purchase costs, which you want included in the batch process.
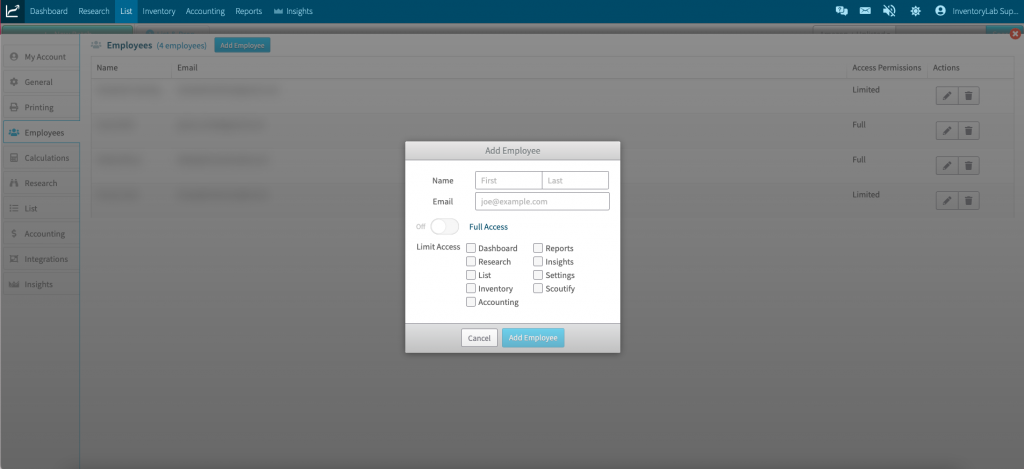
The first step here is to add your prep center as an employee. This article details how to add them, and give them as much (or little) access as you are comfortable with. We strongly recommend giving them the List permissions at a minimum, as that is where they will be working.
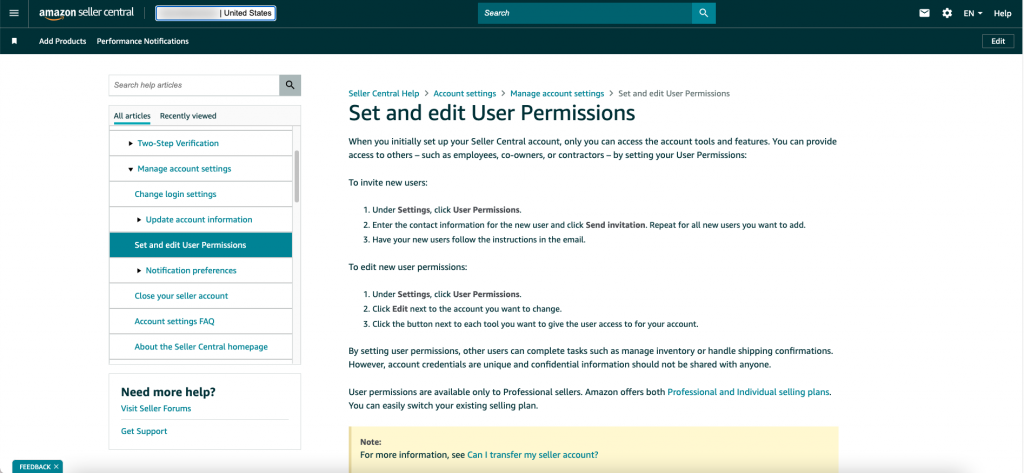
You must add them to your Seller Central account in case they need to make shipments there. This article in Seller Central shows you how to do this:
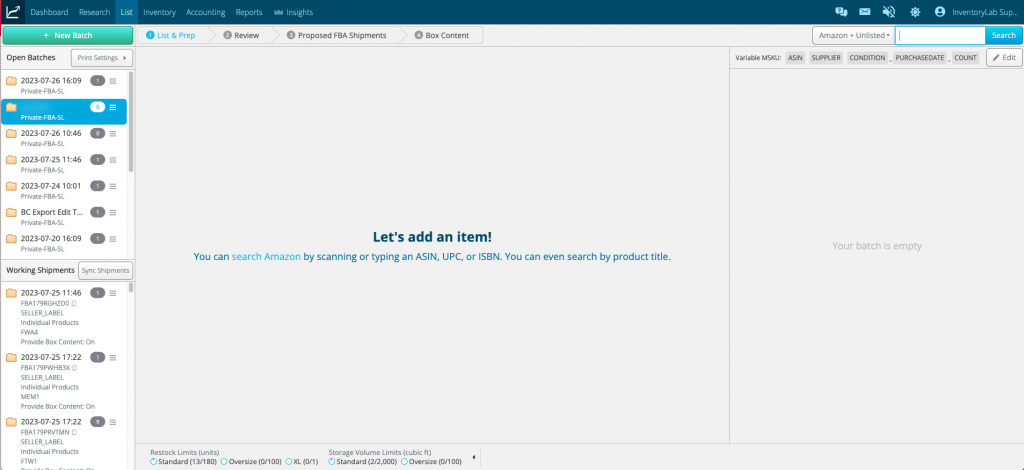
If you want to have more control over the batch process, you can create the batches based on the information from your supplier, including buy cost, expiration dates, list prices, etc. so all the prep center has to do is process the batches you complete.
In this case, you add the products to the batch and enter all of the relevant information. You then notify the prep center which batches are ready to process. Upon arrival at the prep center, the batch is processed – including verification of correct item quantities and any necessary adjustments made to quantities within the batch.
Does your prep center have to use InventoryLab to take advantage of this, so you can still keep track of your buy cost information? Certainly not, but it does make your job easier if they do. But the beauty of InventoryLab is in its flexibility.
Scenario Two: Your Prep Center Does Not Use Your InventoryLab Account
While you don’t have to add your prep center to your InventoryLab account as an employee, you do have to add them to your Seller Central account. That’s because in this scenario the prep center strictly uses your Seller Central account to create shipments and send your items to the fulfillment centers (FC). Be sure to use this Seller Central article for guidance on how to add your prep center:
This type of prep center operates as follows: You first create a batch within your InventoryLab account. In this batch, you list all your products, including their buy cost, supplier, purchase date, expiration dates, and list prices.
You then export this batch and upload it into Seller Central. This will create a workflow on the Send to Amazon page. Your prep center will then create your shipments from the workflow.
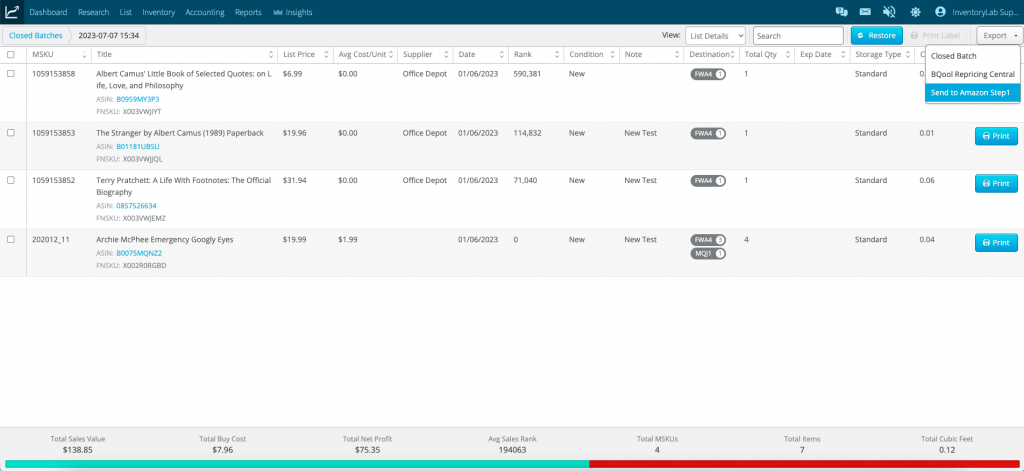
This is the best option if your prep center doesn’t use InventoryLab, since you can still track your buy costs using our batch method. This article in our support portal shows you exactly how to do this:
Uploading a Shipping Plan Using Send to Amazon
Uploading a Shipping Plan Using Send to Amazon (Video)
If the prep center (or you) prefer to let the prep center do everything, and you add in the buy costs later, you can do that too!
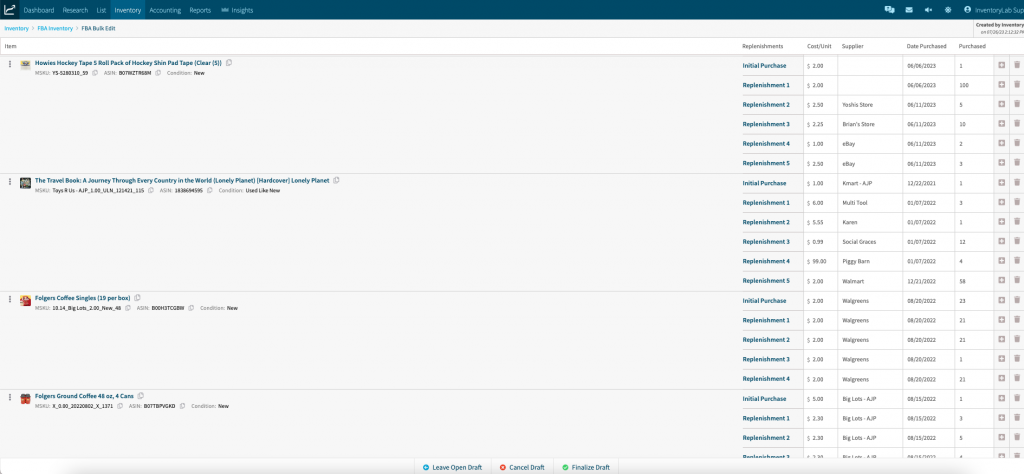
For this, you do have to wait until the products show up on your inventory pages. We sync your inventory pages every 4 to 5 hours, on a daily basis. Once Amazon has your products in their system and we are showing them on your inventory page, you can then use the bulk edit process to easily add in your buy cost information for your products.
This article shows you how:
As your business scales, outsourcing to a prep center can significantly save you time, enabling you to focus on sourcing profitable products. If you need assistance with any of the methods in this post, please reach out to our support team via support@inventorylab.com.
Try InventoryLab Today
30 Day Free Trial
Save time and money by streamlining your Amazon business. Source, List, Ship, and Analyze all in one place.
Get Started
Comments(0)